Wednesday, October 10, 2012

Pumpkin Carving! Recipe: Pasta with Squash and Sage-Brown-Butter

Dear B-Reader,

One of my friends who is venturing into the weekly soup enterprise asked me how to remove the peel from a squash without sacrificing the much sought-after flesh.

In response, I would treat the squash as I would an orange. Here is a website with a great pictorial outline of proper orange peeling and segmenting. To apply to a squash, see first section of my recipe below which puts to use the harvested gourd flesh.

Preparing your own squash really is a simple process once you master it. And, fair warning, you will never, ever, want to purchase the canned stuff again. Ah, truly fresh pumpkin bread could await you!

Let me know if you have any other tricks (or treats) for carving your fave member of the gourd family.

Cucurbitaceae Diem!

- Chalkaholic


Pasta with Squash and Sage-Brown-Butter

From Katherine M. Chalkley (adapted from Southern Living and Donna Hay)

This is great recipe for practicing squash carving skills…just in time for Halloween!

For a heartier version of this recipe: brown one package of ground turkey, season with ½ tsp salt and ½ tsp pepper, add turkey to pasta upon serving prior to the butter drizzle.

For preparing squash

One large gourd (e.g., acorn squash, butternut squash, pumpkin)

2 Tbsp olive oil

½ tsp ground black pepper

Preheat oven to 375 degrees.

Cut top and bottom ends off of squash so that it is able to be standing on cutting board without wobbling. Cut squash in half length-wise.


 Remove seeds from squash halves. Discard seeds (or roast if you are up for a fun snack).

In pot, add two halves of squash. Cover with water. Cover pot with lid. Bring to boil. Allow squash to boil for 10 minutes.

Remove pot from heat. Drain squash. Allow squash to cool for 5 minutes.

Stand one squash half onto cutting board. Using the peeling technique, remove the skin from the squash using a very sharp carving knife. Repeat onto second squash half.

 
Slice squash into one inch thick segments. Place squash into glass dish or other roasting pan; drizzle with olive oil.

Roast for 15 – 30 minutes, or until squash is golden. Top squash with pepper.
 
For dish

1 package dry fettuccini or pappardelle pasta

½ tsp salt

2 Tbsp unsalted butter

1 Tbsp olive oil

3 Tbsp fresh sage leaves (whole)

Roasted squash from recipe above

In pot, fill with water. Bring water to a boil. Add pasta and salt. Allow pasta to boil for 7 minutes or until al dente.

Remove pot from heat. Drain pasta. Set aside pasta.

In sauté pan, heat butter and olive oil at medium heat until butter is bubbling. Place sage leaves into melted butter. Allow sage and butter to sauté until mixture becomes golden-brown in color.

In serving dish, place pasta. Drizzle pasta with sage-brown-butter. Place squash atop pasta. Serve hot.

Monday, October 8, 2012

Neighba' Flava' Part 2! Recipe: Green Soup and Ham, I Am!

Dear B-Reader,

These have been lovely days here in H-Town! Fresh, cool, fall mornings are the perfect beginnings to the month of October. This is one of my favorite times of year for cooking, as I am able to open the windows and not sweat to death while monitoring a culinary creation over a hot stove and oven!


Clara J and the masked Auntie K
With this change of weather often comes a change of health for the masses, unfortunately. I wish I could rock a face mask while being out and about on these autumn days and avoid the traffic jam of coughing on one aisle, sniveling on another, and -- whoa! -- sneezing fast approaching! But, the fashionista wannabe in me would never, ever, wear a surgical mask in public unless medically prescribed or all the rage (maybe I will move to China?). I did, once, wear one this spring when feeling sickly, myself, and caring for baby Clara...

Which brings me to my point. We all need a little TLC every now and then. The fastest way I know to impart a friendly hug without too much germ exposure is in offering someone a delicious, homemade soup. On second thought, germs are not really a prerequisite for sharing this dish; any occasion, even a change in the weather, makes me want to stir up a large kettle of soup and divvy it out to friends and family.

My go-to soup for this time of year: split pea. I love the color. I love the texture. I love the simplicity and heartiness. Try my Green Soup and Ham, I-Am...I couldn't resist...it is a variation of my mother's recipe, made heartier with some herb, ham, and carrots added to the mix...Mom used to read me a lot of Dr. Seuss.

Wishing you well,
Chalkaholic


Green Soup and Ham, I-Am!

Split Pea Soup with Carrots and Ham


Green Soup and Ham, I-Am!
Featuring fresh bay leaf from my garden!
From Katherine M. Chalkley (variation of Marie Walton recipe)

This soup is a hearty one, perfect for a chilly day. Yields 6 – 8 servings. Soup keeps well for several days if stored in refrigerator. Flavor improves if made one day prior to serving. If doubling, double all ingredients with the exception of the ham hock (one goes a long way, baby!).

1 Tbsp olive oil

1 medium white onion chopped or sliced, whatever your whim

3 carrots cut into bite-sized chunks (no need to peel, trust me)

1 package dry split peas

1 ham hock

3 whole garlic cloves peeled

1 fresh bay leaf (or 2 dried bay leaves)

2 – 3 sprigs fresh herbs (thyme, oregano, whatever you have on-hand; or 1 tsp dried herbs)

12 cups water, divided into two portions

½ tsp salt

¼ tsp pepper

Several, thick slices off of a ham slab cut into bite-sized chunks (approx. ½ cup)

In the bottom of soup kettle or dutch oven, drizzle olive oil and heat until just gleaming. Add to oil onion and carrots. Cook at medium-high heat until onions are translucent, about five minutes.

Sort and rinse debris off of split peas (honestly, I always skip this step). Do not soak, do not overnight soak peas, do not quick-soak peas; they must keep their integrity for this recipe’s success!

Into onion-carrot mix, add peas, ham hock, garlic, bay leaf, and herbs. Cover with 6 cups of water.

Bring soup to a boil. Reduce heat, cover pot, and simmer 1 hour.

Add remaining 6 cups of water, salt, pepper, and ham slab chunks to soup. Stir. Simmer additional 30 minutes. Taste and add more salt and pepper if needed.

Tuesday, October 2, 2012

Neighba' Flava' Part 1! Recipe: Turkey Tamale Pie

Dear B-Reader,

It is actually pretty often that I stare at my refrigerator-freezer-pantry and wonder where I am going to find the time and energy to plan, prepare, and finally enjoy a home-cooked meal.

Pretty positive that I am not alone in this thought. Just peruse pins on Pinterest...it's agog with freezer-friendly meals, crock pot dishes, and three-ingredient cuisine (don't get me started...future blog posting). Whenever I offer to bring dinner to a friend, it usually only takes a small nudge for the friend to accept the gesture...because we all need a help working through the "what's for dinner" question. So, in the spirit of sharing, let me go over the following short-cuts I have been practicing in meal planning:

Every two weeks, I thumb through my fave cookbooks and recipe binders in order to locate the meals that I want to make over the next two weeks. My goal is to make dinner 3/4 of the time, so I pull out 10 recipes. Critical: I do not plan on more than 10 meals, as every time that I stray too far overboard, I end up with an overwhelming sense of inadequacy and stray into take-out land.
    1. So that I am able to easily recall my meal plans for the two-week period, I make a small stack of the selected recipes (cards, copies of the cookbook pages), bind them with a binder clip, and place them on my go-to bowl on the kitchen counter. Then, after I have made a particular recipe, I place it in the back of the stack and work from the front.
    2. Within the 10 recipes, I try to make two soups (one per week) and two new recipes that I have not yet tackled, which leaves six recipes from my old tried-and-true stash.
    3. I also like to plan on one of the 10 meals being doubled; I can either store the extra into my freezer for future kitchen black hole moments...or be neighborly and give a friend a meal.
The next task is actually the hardest: determining the ingredients. I go through the list of recipes, categorizing the ingredients into their various grocery aisles (e.g., produce, meat, baking supplies), using the All Out of List. Then I try to tally up the total number of items I will need. It is pretty amazing how many carrots a family of two can go through in 10 recipes! The final part of this task is taking inventory of my current refrigerator-freezer-pantry in order to subtract from my list the items which I already have on-hand. I also take a looksee at the herb garden to assess the fresh yields (which really make all the difference in every recipe).

Laura Bond Fresh (L) and Chalkaholic (R) in London.
Spending our time together instead of a grocery queue. :)
 
The easiest step is a British trick my once mentee, Laura Bond Fresch, has recently taught me: online grocery shop. I have found a store in Houston which delivers to my home at a time that I specify, calls ahead, and even brings the sacks of goods to my kitchen counter! The online site saves my shopping lists so that the next time I need to order, I can simply add to or subtract from my previous lists. For those of you in the H-town area, check out Rice Epicurean. Although the service has a fee, it is nominal for the time that it saves me on those uber-busy weeks. The key is to use the online shopping for ingredients and staples of the kitchen that will be consumed within the two week time period, not laundry and household supplies.

Once I have my ingredients in-stock in my kitchen, then it is time to get to work.
    1. I like to divide up my meats into one-dish servings (1/2 lb), wrap in parchment paper, and place into freezer bags into the freezer for easy use in the future. Just thaw overnight in refrigerator.
    2. While dividing, I place snackable items into single serving portions in one large pantry container. I just grab and go when on the run and in need of a healthier option than a Snickers.
    3. I also wash fruit and leave room-temperature-friendly fruits out on the counter for another easy grab and go. The wussy refrigerator variety calls for a bit more TLC, so I rinse and then place into reusable containers. I find that when the fruit is washed and ready to go, the it actually gets consumed! Imagine that!
Last week, my neighbors helped out my family with dinner when we were pressed for time. I will be sure to get Carrie's sliders recipe and post that for you later, as they were very delicious! This week, I am returning the favor with Turkey Tamale Pie. Want to go all Mr. Rogers' Neighborhood with me? Then double this recipe!

Pie is Good, Pie with Friend is Betta',
Chalkaholic

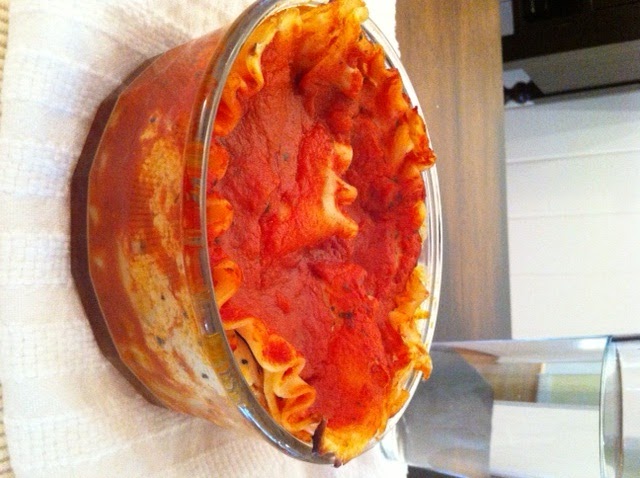
Turkey Tamale Pie: one for me, and one to share.


Turkey Tamale Pie

From Katherine M. Chalkley

This dish serves four. Refrigerates nicely for several days of leftovers. If time permits, make ahead and refrigerate one-half-day in advance in order to blend the flavors well. A nice topping for the dish is shredded cheddar cheese, sour cream dollop, guacamole, or picante sauce.

For the meat filling

Vegetable oil

½ lb ground turkey

½ lb ground beef

2 Tbsp fresh basil, chopped

1 large tomato, diced

1 (one) 4.5 ounce can green chiles, diced

½ bag fresh spinach

1 Tbsp cumin powder

1 Tbsp garlic powder

1Tbsp chili powder

6 – 12 drops (to taste) Tabasco sauce

¼ - ½ cup beef broth, unsalted

 Salt and pepper to taste

1 Tbsp water plus 1 Tbsp cornstarch

Preheat oven to 425 degrees.

In sauté pan, coat bottom of pan with veg oil and heat until just gleaming. Add ground turkey and beef, mashing with fork until well mixed with one another. Cook ground meats until all pink coloring is removed. Drain meat mixture of oil and excess water.

Add to meat in sauté pan the basil, tomato, chiles, and spinach. Cook for a few minutes or until spinach is wilted (do not overcook).

Add to mixture in sauté pan all of the seasonings (cumin, garlic, chili, Tabasco) and the beef broth. Cook for one minute or until fragrant. With small spoon, taste mixture. If it needs salt and pepper, combine and use sparingly.

In a small bowl, combine water and cornstarch in order to form watery paste. Pour paste into mixture in sauté pan, stir and cook for one minute in order to thicken sauce. Turn off stove and set aside meat mixture to cool slightly while you make the topping.

For the cornbread topping

2 cups stone ground cornmeal (I like to use Bob’s Red Mill)

2 cups whole wheat flour

1 tsp salt

8 tsp baking powder

2 Tbsp sugar

2 eggs

1 cup beef broth, unsalted

½ of can (15 ounce can) whole kernel corn, unsalted

½ cup (one stick) butter, unsalted, melted

In large bowl, combine cornmeal, flour, salt, baking powder, and sugar. Stir until blended. Set aside.

In second large bowl, combine eggs, beef broth, corn, and melted butter. Beat well.

Add to the cornmeal mixture the egg mixture, being careful to not overbeat. Beat until just blended. Set aside for 5 minutes in order to allow all ingredients to settle (promotes baking).

In deep pie dish, add to the bottom the reserved meat mixture. Cover the meat with cornbread mixture until about ½ an inch from the rim of the pie dish. If there is extra cornbread mixture, why not make cornbread muffins? Place filled pie dish atop baking sheet in order to catch any run-off during baking.

Bake dish in preheated (425) oven for 20 minutes or until cornbread is a golden brown or is showing slight cracks in the crust. Do not overcook the cornbread, as nobody enjoys dry, crunchy cornbread. Set aside to cool for 10 minutes before serving.

One-Year-Old Party and Recipe: Salads in Phyllo Shells

Dear B-Reader,

My little niece Clara is now a one-year-old! This past weekend, fifty of the family's closest friends and relatives celebrated with my sister and brother-in-law at their lovely home. It was a triumph, with Clara successfully smashing her confetti cake and coating herself in pink frosting!

In our family's typical party-fashion, the food was a joint-effort, which I highly recommend to any of you party-throwers: divide and conquer! As the person of the hour was a young child, we steered clear of any items that she would not be able to consume (e.g., nuts) and focused on some of her fave cheese and fruit cuisine. Miss Independent likes to feed herself these days, so foods were "finger" foods.

Here is a select list of the items served which would be great for any party, regardless of the age of the "child!"
  • Drinks: lemonade with floating lemon wheels, iced tea, beer and wine for the adults
  • Dips: fresh guacamole, ranch dressing, chile con carne (queso with ground sausage; warmed in crock pot)
  • Tortilla chips for dipping
  • Vegetable sticks
  • Cheddar cheese cubes
  • Fruit kabobs with marshmallow tips
  • Chicken salad with apples and shrimp remoulade salad in phyllo shells
  • Meat balls (warmed in crock pot)
  • Cupcakes with buttercream frosting

A few party-prep words from this foodie:
  1. Always prepare more food than you believe that your guests will eat. Set aside about 1/4 of what you have prepared into the refrigerator or a cooler set aside from the party. If you begin to run low, just bring out your secret stash. If your guests only eat what the original portion, then you are in luck...your next meal is already ready for you (especially great to have pre-made food available for you and your clean up crew after the crowd departs).
  2. Take advantage of make-ahead items. For this party, that would be the cheese cubes, salads, cupcakes. For the cupcakes, make three days in advance, leave unfrosted, and place into air-tight container at room temperature. For the cupcake frosting, make up to 10 days in advance and place into air-tight container in refrigerator; the day of the party, bring frosting to room temperature and then whip in electric mixer for five minutes in order to reincorporate air. Frost cupcakes two hours in advance of party and leave at room temperature.
  3. If you are pressed for time or are not yet ready to make all items from scratch, then pick and choose only a few key items to make homemade; the rest can be substituted with packaged solutions. For this party, a lemonade mix could be perked up with freshly-cut lemon wheels; meat balls are available in your grocer's frozen section and could be topped with an easy, homemade BBQ sauce (mustard, ketchup, garlic powder, dried onions, brown sugar); use a cake boxed mix for the cupcakes and simply top with Martha Stewart's fab, homemade frosting for that gourmet flare.
Now, a make-ahead half-scratch half-store bought recipe that you, B-Reader, can take to your next event!

Party on,
Chalkaholic


Chicken Salad with Apples and

Shrimp Remoulade Salad in Phyllo Shells

From Katherine M. Chalkley

Each recipe yields 60 appetizers; plan on each guest eating 2 – 3 shells. Salads may be made up to 2 days in advance of serving if stored in air-tight container and refrigerated. If preparing for a meal, then use larger phyllo shells (e.g., Pepperidge Farm Puff Pastry) and fill with 1/2 cup salad.

For the Phyllo Shells

4 (four) 15-count packages of frozen, premade mini phyllo shells (found in grocer’s freezer beside pie crusts)

Preheat oven to 350 degrees. Place shells on baking sheet; it is okay to have them close together, as they will not expand. Bake for 3 – 5 minutes. Remove from oven and allow to cool for 30 minutes minimum prior to filling. The shells may sit on counter, covered with tea towel, for several hours.

For the Chicken Salad with Apples

1 (one) 2-lb bag of frozen chicken breast tenders (boneless, skinless)

Salt

Pepper

Olive oil

1 – 2 cups mayonnaise

4 Granny Smith apples

Preheat oven to 375 degrees. Place chicken tenders on baking sheet. Season with salt and pepper and drizzle with olive oil. Bake for 30 minutes. Remove from oven and allow to cool for 30 minutes before handling.

Shred chicken with two forks, with one fork – secure piece of chicken, with other fork – pull chicken in one direction. Set aside shredded chicken.

In large bowl, add mayonnaise.

Core apples and cut into bite-sized chunks (1/2 inch). Add apples to bowl with mayonnaise. Stir well in order to coat all apple chunks (prevents discoloring).

Add to bowl shredded chicken, about ½ a cup at a time in order to evenly fold chicken into mayonnaise mix.

Chill salad mixture for 30 minutes or more. Just prior to serving, pile 1 – 2 Tbsp of chicken salad into each phyllo shell. Serve immediately.


For the Shrimp Remoulade Salad

2 lbs of refrigerated, pre-cooked, peeled, deveined shrimp (found in grocer’s fresh seafood section)

½ of one onion white, diced

Olive oil

2 Tbsp fresh tarragon (leaves only, discard stems)

1 Tbsp dried fennel seeds, crushed

2 lemons, juiced

1 – 2 cups mayonnaise

1 Bell pepper, diced

1 Tbsp capers, drained and rinsed

1 tsp anchovy paste

2 Tbsp Dijon mustard

Chop shrimp into bite-sized chunks. Set aside.

In sauté pan, heat olive oil until just gleaming. Add onion and tarragon. Sauté for five minutes or until onions are tender. Set onion mixture aside to cool for five minutes.

While onions are sautéing, add remaining ingredients into large bowl. Mix with large spatula in order to combine well.

Add to mixture the onions. Stir well.

Add to mixture the shrimp. Gently fold.

Chill salad mixture for 30 minutes or more. Just prior to serving, pile 1 – 2 Tbsp of shrimp salad into each phyllo shell. Serve immediately.


Thursday, August 2, 2012

Lasagna for Me!

Dear B-Reader,

As you may already know, Jeff and I try to be a lactose-free household...and by many standards, we are relatively dairy-free as well to health reasons. My long-lost love, cheese, is always trying to seduce me, especially when I browse through the lovely Italian recipes in my cookbook collection. No more, dairy devil! I have conquered you in the lasagna battle with non-dairy ricotta!

Interested in trying your hand at this super-easy and very good-for-you recipe? Read on...

Non-Dairy Lasagna.
If any of my techy-type readers are able to address why this image is not rotated properly and how to correct, please let me know!

Non-Dairy Lasagna by Chalkaholic


For the dairy-free ricotta (adapted from http://cowsmilkisforcows.blogspot.com):

1 package silken tofu

2 tsp fresh lemon juice

2 tsp olive oil

1 clove, minced garlic

½ tsp salt

½ tsp pepper

½ tsp oregano and any other of your fave Italian herbs

2 Tbsp nutritional yeast (not baker’s yeast; find it in the vitamin section of Whole Foods)

For the lasagna:

Water

Salt

½ package of lasagna noodles (I love the Colavita Lasagne product, 17.64 oz package)

1 jar pasta sauce (Newman’s own marinara is delicious)

Make ricotta:

Process tofu by placing tofu blocks atop cutting board, sandwiching the tofu between several sheets of paper towel; press firmly using the back of a frying pan- don’t be afraid to pound away; the majority of the excess water will be pressed away from the tofu, leaving a mushy substance the consistency of cottage cheese.

Place pressed tofu into a large bowl. Using a potato masher, mash tofu. This is a physically fun recipe, between the pounding and mashing…work it!

Add to mashed tofu lemon juice, olive oil, garlic, salt, pepper, and herbs. Mix well.

Add to mixture nutritional yeast.

Be certain to taste ricotta before using. It should resemble the flavor of a mild goat cheese. Do not expect a dairy miracle, OK? But trust me, it’s good and good for you! Refrigerate until ready to use.

Make lasagna:

Preheat oven to 350 degrees.

In a large pasta pot, bring water to a boil. I’ve learned the hard way that one must have plenty of water in order to allow the noodles free range of motion. Use the interior screw marks of the pot handles as a guide; water should go just above this line.

Add to boiling water a dash of salt.

Add into salt water the lasagna noodles. Boil for exactly 10 minutes. No more, no less, as we want just under al dente texture, as the pasta will cook further in the oven…and no one likes mushy pasta. Stir only once in order to avoid the sticky, mushy factor. For real!

After lasagna is under al dente, drain pasta and set aside to cool.

In an oven-safe casserole dish (I prefer a glass dish so that I may keep a watchful eye on the lasagna), layer the following to line the dish bottom:

·         Sauce

·         Noodles (1 strip thick…you may use several strips in order to coat the sauce layer, but do not overlap the noodles atop one another)

·         Ricotta (3 – 4 spoon-fulls, spread evenly)

·         Sauce

·         Noodles

·         Ricotta

Repeat above until ½ inch from the rim of the dish. Make the final layer Noodles covered in sauce (no ricotta at the top)

Place lasagna dish onto a baking sheet and cover dish with foil; place dish/sheet into the heated oven. Bake for 30 minutes; remove foil and bake for an additional 10 minutes in order to crisp top layer of lasagna.

***If meat is desired, I suggest browning the seasoned ground beef, draining the meat, and layering it after the ricotta and before the sauce***

This dish improves with a little time…if refrigerated, try to consume within 3 days. Reheat in foil-covered dish for 30 minutes.
United in Spatulas,

Chalkaholic

Wednesday, August 1, 2012

Noo Loo - parts 3 & 4

Dear B-Reader,

Let the games begin! Totally vibing Olympics right now...love it! A bathroom remodel is a total team sport...akin to gymnastics, Go, USA Women! I can totally see the gold/granite. :)

Public Relations and Sport Sensei Béla Károlyi played by Dad
Team USA Coach John Geddert played by Jeff
Team USA Coordinator Márta Károlyi played by Chalkaholic
Fierce Five played by Plumbers-Tile Masons-Stone Masons-Carpenters-Drywall Installers

12. A week ago, Sunday, in anticipation of drywall to begin the following day, Dad and Jeff added insulation to the existing exterior wall of the bathroom (wall with window). It has been cold, London-like balmy cold, in our bathrooms, and now we know why. The exterior walls had zero, I mean - stepping with no grace, spinning like a whirling dervish, and taking a falling hop  on the balance beam dismount - score of zero insulation. Not anymore! We are doing a routine with 16.5 degree of difficulty and scoring 16.5, yo!
13. Monday and Wednesday, drywall process began. We originally demo-ed only half of the existing drywall, hoping to preserve some of the original and simply mud over the top, refinish, and paint. However, the master drywall smiths let us know that as drywall ages, it becomes brittle, and the installation of new fixtures such as A/C vents, recessed lighting, etc., would break the old drywall and require replacement in the near future. Therefore, we opted to demo all of the existing drywall and install new, glorious drywall. The "tape and float" process smells like teenager sports socks. Gross
14. Friday, drywall completed. One small snag...they originally drywalled over the cool outlet for the hair tool caddy. Chalkaholic's documentary-style photography to the rescue...drywall installer used the photo as a map to the location of the outlet and simply cut it out of the drywall. Tile masons installed their version of water-resistant drywall, Perma-something, in the shower area and built up the shower bench. They Perma-something was "taped and floated" using a deathly-looking and -odoriferous red substance...reminded me of what blood would appear to be in a person exposed to toxic levels of radiation (I think my summer reading of The Hunger Games series is warping my imagination). All work completed just in time for the 2012 London-to-Houston Opening Ceremony Party at Chalkley Stadium.
15. Saturday and Sunday, clean, clean, clean, rest, rest, rest.
16. Monday, tile was laid on shower walls-ceiling-floor. Floor of the remainder of bathroom was mudded to prep for the tile to be laid the following day.
17. Tuesday, tile was laid on mudded floor. All tile was grouted a beautiful, khaki color. Granite was laid atop the shower threshold and the shower bench for a completed, hotel-quality look. Actually, saw this look in London's The Ruben's at the Palace boutique hotel this past spring.
18. Today, Wednesday, was quite an ordeal. HVAC is a topic for a whole, separate blog entry...let's just say that I have met with the inspector now three times and a different member of the installation team for a total of five times. I feel like we are trapped on the uneven bars without a spotter...but plenty of chalk dust surrounding us. Back to topic, cabinets were delivered and half-way installed (guess why...A/C...how did you know???). Granite stone mason came out to measure the vanity top so that the granite is sized perfectly to match the glorious, espresso vanity cabinet. Ah, so dreamy. Thanks to Dad and Jeff for being go-betweens and refocusing me to keep my eye on the prize.

And, your favorite part of the games, the pics of the events:

Insulation installation.
Drywall covering the whole between the two bathrooms (where the hall bathroom's original linen closet was taken over in order to enlarge the master bathroom shower).
 Drywall installation at exterior wall (where window was and where vanity will be).
 Drywall installation around shower (not IN shower, as drywall must remain dry).
 Perma-something installation and shower bench...welcome to my haunted house.
 Tile and granite on shower and bench.
Another view of shower tile and granite.
 Complete view of shower.
Vanity cabinet installation. The open space on the left is where the cool hair tool caddy will reside...being built as I type...


Cheerio,
Chalkaholic

Friday, July 20, 2012

Noo Loo - part 2

Dear B-Reader,

We are officially one week into the master bathroom remodel...and I have only lost my cool (in private, of course) twice! Not too bad, I am told...

Here is the progress since the last entry:
8. Tuesday, tile contractor installed mortar sub floor for the shower. I was seriously tempted to draw my initials in the wet concrete, but the little angel on my shoulder wouldn't let me.
9. Wednesday, much-needed time off from the remodel. Mortar sub floor also needed drying time.
10. Thursday, plumber installed shower pan (plastic liner over mortar sub floor) and filled it to the brim with water. Pretty cool.
11. Friday (today), electrician installed remaining outlet under the vanity. This is the awesome feature of the remodel: in the vanity cabinet, a vertical drawer that will have sections assigned to suspend the hairdryer and the curling irons...and the tools will be plugged into a power strip within the drawer...no more cumbersome cords! Electrical inspections - passed! Plumbing inspections - passed! I love being a straight-A student!

And some photos:

Shower with plumbing rough.

Shower pan. Ah, look at that beautiful, floating debris...gross.

Vanity plumbing rough. Electrical outlet for my fancy hair tool caddy to the left of snow shovel...great for pushing back insulation in an attic.

Vanity lighting and main lighting for the bathroom.

Another shot of the main lighting for the bathroom, coupled with the old lighting (to be demo'ed next week, along with all remaining drywall. Note remaining exhaust fan. In background are the two lights for the shower, diagonally flanking the rainshower plumbing rough. Rainshower is Jeff's fave feature of the new bathroom.

Mia and Puccini are graciously lending their Kitty Bedroom to Bella, Jeff, and me during the remodel. I think we are already overstaying our welcome...

Have a great weekend!

-Chalkaholic

Monday, July 16, 2012

Noo Loo - Bathroom Remodel Chalkaholic-Style!

Dear B-Reader,

Well, spring has passed, and we are well into summer. You must have been wondering where your beloved Chalkaholic has been...I am still here, plugging away with work, family, friends, and the home.

The homestead is undergoing a modern remodel. We're starting with the master bathroom...or, for those of us prepping for the London 2012 Summer Olympics, a Noo (new) Loo (potty). :) Jolly good, gov'na!

Here is the progress to-date:
1. Tuesday, moved out all bathroom belongings from master bathroom and tucked them away into every nook and cranny available throughout the house.
2. Wednesday, moved nightstand and necessities from master bedroom into the kitty bedroom (yes, our kittens have their very own bedroom, complete with a queen-sized bed...they are royalty, of course), where Jeff and I will be sleeping for about a month during the remodel.
3. Thursday, a bit of a let-down. There was a huge deluge in Houston, and the framer asked to reschedule demo and framing for the following two days. :( It all worked out well, though, as I was way to busy with work and volunteering that day to mess with the remodel.
4. Friday (the 13th...dum-dum-dah!), demolition and rough framing started and completed in ONE day! Not the anticipated TWO! Woohoo! Jeff took the furry babies to the clinic so that they would not be bothered by the in-and-out of the crew and the noise pollution of the jack hammer. Later that day, I cleaned up as much of the dust from the hall bathroom as is possible so that we would have a clean place to get clean. Mom and Dad visited, and both gave their thumbs up!
5. Saturday, a bit of a respite. Jeff cleaned the dust off of the master bedroom furniture and its floors. What a great husband I have!
6. Sunday, no remodel. Showed off blank canvas to architect (virtually) and neighbors for their thumbs up! Received!
7. Monday (today), rough plumbing in progress and should be completed by end of day. Several other contractors visited work site to scope out the job and make proposals. Too bad they don't propose the way Jeff did...with diamond ring in-hand...

Now some photos.

Original Shower (note triangle shape and low ceiling and short length) and wall heater.
 Expanded shower, made it rectangular, and removed wall heater. To expand, we removed a cabinet in the hall bathroom that was adjacent to the master shower.
 Raised the shower ceiling to be in-line with remainder of bathroom ceiling.
 Original toilet.
 Gutted toilet area. Will now have an above the commode cabinet.
 Original vanity next to wall heater.
 Original shelves and window opposite commode.
 New location of vanity will be under walled-in window. Mirror will go over walled-in window. Shelves are gone like the wind!
 View to the master bedroom from the master bathroom. The right is where the new pocket door will go.
 And the dust!

Now back to the homestead to check out today's progress. Plumber just said he was finished with the roughing in work. :)

- Chalkaholic

Monday, February 13, 2012

Service to the Customer

Dear B-Reader,

As Valentine's Day is less than 24-hours away, one can't help but be inundated with over-used phrases such as "I love you!" "You rock" and "U R cute". These one-size-fits-all vernacular threaten the importance of the original connotation of these words. But, today's entry is not intended to be a lecture on romantic phraseology.

Rather, my focus today is on the related loss of the meaning of another phrase: Customer Service.

One might argue that in today's communication-oriented business economy, every industry must focus on customer service or else risk capitalist extinction. It seems that most businesses do understand this need, as evidenced in the popular "customer service" link on business web sites, the "dial 0 to speak with a customer service agent" on 1-866 or 1-800 phone lines, etc. But as often happens with something that has become so commonplace, with few exceptions, the true art behind the craft of customer service has turned into something mechanical, automated, and even worse...forgotten. Customer service is not a department within an organization. It is not a noun. It is a verb, the act of providing service to the customer. You know, the customer, that person whose purchase of your product pays for your job to exist and for you to receive payment from your employer/said organization.

Let me illustrate one exceptional organization which does, indeed, understand and put into practice the action words "customer service." Nordstrom.

In preparation for a trip abroad, I purchased a London Fog coat from Nordstrom's online department store. In a few days, the coat arrived -- perfectly packaged in tissue, on hanger, and wrapped in plastic to prevent wrinkles. After closer inspection, I realized that there were no extra buttons. Normally, I would not notice such a thing until it was too late (as in, a button popped off while I was sitting down to a nice dessert with a fashionista girl friend of mine); however, due to recent clothing blunder with another coat, I have become extra button obsessed.

Referring to the enclosed packing slip, I dialed the Nordstrom's customer service line and immediately was connected to a living person, Stephanie. She was very helpful and quick to apologize for the neglected buttons and even more quick to come up with a novel solution. She offered to contact the London Fog supplier and have them ship me a package of extra buttons to fit my coat. I agreed, thanked her, and Stephanie and I ended our conversation.

A week later, in the mail came a lovely letter from the London Fog supplier along with a package of buttons of all sizes for my coat!

Nordstrom is one of the businesses which takes to heart the concept of providing excellent service to the customer. Thank you, Nordstrom, for being my go-to purveyor of this now rare commodity.
http://shop.nordstrom.com/